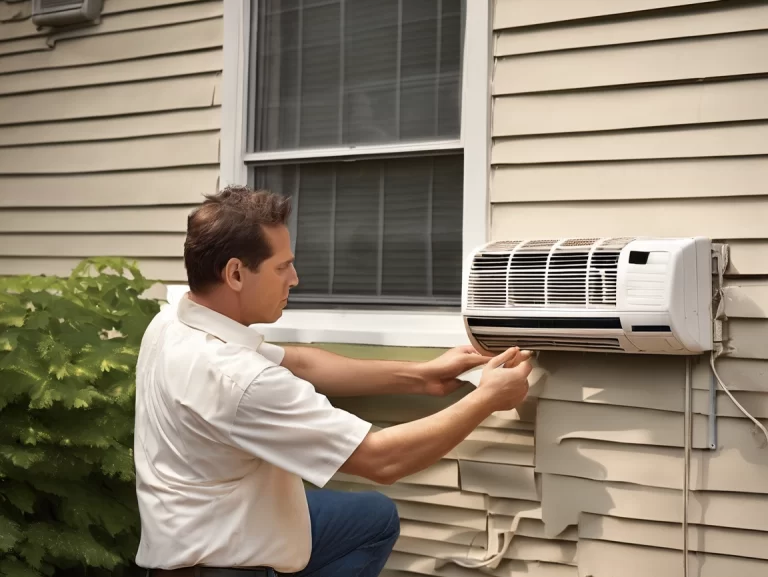
Ever catch your Rancho Bernardo home feeling stuffy during one of our hot, dry Santa Ana wind spells? Before you grab the phone to call a technician, there are actually some easy DIY tips you can follow to increase your airflow and breathe a little easier. In this post I’ll share simple, locally-relevant d.i.y. Tips to get your home’s air flowing—saving you time and money right here in North County!)
Airflow Basics
They say airflow is the spine of any efficient HVAC system. Each one – residential or commercial – draws in air, conditions it, and pushes it through supply and return ducts. This cycle is what keeps your home comfortable and healthy — with stable temperatures and quality air all year long. Weak AC airflow, hot and cold spots or lingering dust are all symptoms that something is amiss. Routine tune-ups keep these issues at bay, so your HVAC purrs along in tip-top shape.
Common Causes
- Dirty or clogged air filters restrict air movement.
- Blocked or undersized ducts restrict airflow and cause hot or cold pockets.
- Faulty blower motors or malfunctioning fans reduce air output.
- Wrong thermostat adjustment can make your system pump harder, causing bad circulation.
- Low refrigerant levels lower system performance.
- Under or oversized HVAC units or ductwork can’t satisfy your space’s requirements.
- Airflow obstructions from furniture or closed vents disrupt circulation.
- Lingering dust or stinky, stuffy rooms are tells of airflow problems.
Blower fan or thermostat errors, for example, are the kind of thing that slips under the radar, but can rapidly become unpleasant. If you’re experiencing cold rooms while the rest of the house is warm, you have a circulation problem. Air balancing, or testing the system for pressure and airflow, uncovers these issues before they become larger headaches.
System Design
A quality duct system helps promote even airflow throughout all rooms. With insufficient return air registers, your HVAC system fights to equalize pressure and ends up with feeble airflow and annoying drafts. Incorrectly located or inadequately sized vents may result in noisy operation or inefficient cooling and heating. So be sure to size your HVAC unit accordingly—using 400 CFM as a benchmark per ton of AC capacity. For individual rooms, calculate the required airflow with: CFM = (Volume of the Room in Cubic Feet) ÷ Minutes per Air Change.
Mini-split systems, by contrast, allow for zones within a home to be cooled or heated independently of each other.
Local Climate
Local weather patterns play a big role in your HVAC’s performance. In hot, humid months, maximize airflow and ensure ceiling fans rotate counterclockwise to push cool air down. Controlling indoor humidity—through dehumidifiers or humidifiers—supports your system in keeping air quality and comfort consistent despite the outdoor atmosphere. Strong winds or storms have an effect on your outdoor condenser’s efficiency, so keep the area free from debris.
Tune your maintenance routine for seasonal changes. Filters must be replaced a minimum of every 90 days for best circulation. If airflow issues persist, Rancho Bernardo Heating & Air provides 24/7 support and transparent pricing for any repairs needed—just reach out at 858-609-0970 or info@ranchobernardoairconditioning.net.
Filter Solutions
Healthy airflow begins with the fundamentals—your HVAC filter. Dirty, clogged or incorrectly sized air filters are one of the top causes of weak airflow, higher electric bills and expensive repairs. For both homeowners and businesses, routine filter maintenance isn’t just a best practice, it’s a necessity for maintaining smooth operations and healthy air. It’s one of the easiest things to try before you pick up the phone to call a technician.
Filter Types
Picking your filter out isn’t just about snatching down the pack closest to you on the trip to the store. Every HVAC unit is sized for specific filter types and sizes, and using the incorrect one can restrict airflow or let dust pass around the system. Most homes and businesses rely on disposable pleated filters or washable electrostatic options. Disposable fiberglass filters are ubiquitous, yet provide the least amount of filtration. Pleated filters, MERV 8-12, strike a balance, allowing good airflow while catching finer particles. Higher-rated filters (MERV 13 and above) can choke airflow if your system isn’t built for them.
Below is a table to help you track filter options:
| Filter Type | Common Sizes (cm) | Recommended Change Interval | Notes |
|---|---|---|---|
| Fiberglass (disposable) | 40×50, 25×50 | 1 month | Low filtration, max airflow |
| Pleated (disposable) | 40×50, 25×50 | 2-3 months | MERV 8-12, balanced choice |
| Electrostatic (washable) | 40×50, 25×50 | Clean monthly | Reusable, moderate filtration |
| HEPA (high efficiency) | Custom | 6-12 months | Only for compatible units |
Be sure to always pair the filter with your HVAC’s specifications. If you’re not sure, refer to the manual or a trained technician. The incorrect filter choice not only decreases efficiency, it causes excessive wear and tear, which means your system needs repairs more often. Keep in mind, more filtration doesn’t mean better if it overworks your blower motor.
Replacement Timing
Replace air filters every 1-3 months, more if you have pets, allergies or dusty living conditions. High-use times, such as summer cooling or winter heating, deserve more careful observation. Others suggest checking once a month, particularly in multi-occupancy or pet-heavy homes.
I set reminders on my calendar or smart phone before peak seasons. Visual inspection works well: if the filter looks gray, dusty, or clogged with pet hair, it’s time for a replacement. Regularly scheduled checks keep you out of unexpected airflow trouble and prolong system life.
Something as simple as a spreadsheet or paper log can assist in keeping track of when each filter was last changed. This habit fuels both comfort and efficiency. Making filter replacement routine saves time, saves money and delivers reliable indoor air quality.
Vent Adjustments
With some proper vent adjustments, you can help balance the airflow, and increase comfort and efficiency across your home or office. Even prior to calling a tech, a bit of vent diligence can solve many common airflow issues. Frequent vent adjustments assist in keeping your HVAC system operating at its peak, guaranteeing the proper air volume and temperature within each room.
Blocked Vents
Start with a simple checklist for each room: inspect every supply vent for visible blockages. Furniture such as sofas, beds, dressers, or even heavy drapes tend to cut off air circulation more than homeowners understand. Displace these a minimum of 30cm from vents. Rugs and decor block the air if they’re on or near floor registers.
Dust, pet hair, and household junk can accumulate rapidly on vent covers. Vacuum the vent grilles with a brush attachment, or clean them with a soft brush. This simple maintenance tidbit avoids diminished airflow and promotes fresher indoor air. If you find some rooms are always stuffy or cold, see if their vents are partially closed or blocked. Opening all registers all the way, especially the farthest from the unit, maximizes air movement and can expose a duct blockage lurking in the shadows.
Test for uneven flow. Even the first vents out of a duct tend to be stronger than the ones at the end. You can control the amount of air flowing to individual rooms by adjusting dampers or louvers on the vents themselves. This tactile strategy not only enhances comfort but helps avoid imbalances in pressure that lead to drafts or uncomfortable conditions in certain spaces.
Return Pathways
Return air vents are as crucial as supply vents for good circulation. Always check these are not blocked by furniture, boxes or drapes. Even partial coverage can diminish system efficiency and leave rooms feeling stuffy. Cleaning return vent grilles and the area completely removes dust that would otherwise inhibit airflow back to the system.
Keep interior doors open as much as possible, particularly in larger homes or offices, to let air flow between rooms. If privacy is an issue, install transfer grilles above doors. These encourage air circulation even with closed doors.
For larger spaces or multi-room areas, verify that every significant space has a return vent. Low returns can cause pressure drops and dead air so that certain rooms feel stuffy. If you observe uneven cooling or heating, this may be a sign of insufficient or obstructed returns. Altering or supplementing your return paths is a small measure that can have a big impact on comfort and efficiency.
Ductwork Checks
Ductwork checks are an actionable means of identifying and addressing airflow problems prior to engaging a professional. Regular checking of your HVAC ducts can identify leaks, blockages, insulation issues or even dust accumulation on blower blades that can all sabotage your system’s efficiency and comfort. Homeowners can leverage these checks to keep systems healthy, avoid major repairs, and even save on energy bills.
| Duct Issue | Fix | Suggested Maintenance Frequency |
|---|---|---|
| Visible leaks | Aluminum foil tape or mastic sealant | Every 6–12 months |
| Poor insulation | Replace or add duct insulation | Annually, or after extreme weather |
| Blocked vents | Clear obstructions, adjust furniture | Monthly |
| Dust on blower | Clean or schedule professional cleaning | Every 6 months |
| Loose connections | Tighten and seal joints | Every 6–12 months |
| Malfunctioning blower | Inspect motor, call technician if needed | Annually |
Visible Leaks
Leaks are prevalent where two ducts meet or at seams. Inspect duct runs for obvious holes, tears or joints that appear separated. With the HVAC system on, pass your hand along the ducts and sense for streams of leaking air—this is frequently the quickest method to verify a leak if you can’t detect one visually. When you find a leak, mark it – a marker or tape – so you can return and seal it. Start with the primary supply and return trunks, particularly those serving multiple rooms or high-use zones, as these affect the most airflow. Sealing leaks with aluminum foil tape or mastic sealant is the answer and will hold up way better than duct tape.
Insulation Issues
Ducts traveling through attics, crawl spaces or basements frequently leak lost conditioned air if insulation is absent or torn. Be sure to inspect for holes, ripped areas or damp locations in the insulation. If insulation is missing, swapping it out with HVAC-rated material doesn’t just keep the air flowing at the right temperature—it keeps condensation and mold at bay. It’s crucial that you use insulation with the right fire rating, because the stuff they sell at your local hardware store probably isn’t safe. If you live in a particularly hot or cold area, supplementing your exposed ducts with additional insulation can enhance comfort and efficiency by reducing temperature swings and strain on the system. Good insulation saves energy bills and gives your HVAC a longer life, so it’s a smart purchase for any homeowner.
Fan and Thermostat Tips
Controlling airflow isn’t hard, but a couple of specific moves can go a ways prior to calling in the professionals. A little science — and some smart tips for using blower settings, thermostat placement and ceiling fans — goes a long way toward maximizing comfort and efficiency in any home or business.
Blower Settings
Let’s talk about blower settings for your HVAC system. If you want to save energy, put your system’s fan on ‘auto.’ This operates the fan only during heating or cooling cycles. For consistent air circulation and more uniform temperatures, setting the blower to “on” keeps air moving 24/7, ideal for hot climates or multi-level homes. A few systems let you adjust blower speed—raising it can assist stifling or slow-to-cool rooms. Pay attention to abnormal noises from the blower like rattling or grinding. Such noises might indicate dust buildup or a failing motor. Clean the blower wheel and compartment every few months to avoid mechanical issues and promote optimal performance.
Thermostat Placement
Where you locate your thermostat counts for comfort and your energy bill. Mount it on an inside wall, out of direct sunlight and away from windows, vents or doors. Keep thermostats away from ovens or PCs, these sources emit heat that might throw off readings. A thermostat that’s set too high or low wastes energy and money. Keeping it at 25.5°C (78°F) instead of 22°C (72°F) in the summer can reduce energy use by up to 10 percent. Ensure thermostats are hung at eye level, which aids in easy adjustments and accurate temperature sensing. If your existing arrangement results in uneven cooling/heating, moving it can fix a lot! Programmable thermostats are worth considering–they allow you to schedule temperature changes for different times of the day and promote efficiency.
Ceiling Fans
Ceiling fans are smart additions to complement your HVAC’s efficiency. Summer – push cool air down – rotate blades counterclockwise. Flip to clockwise in the winter to recirculate warm air. This basic hack can cause rooms to feel cooler or warmer without actually adjusting the thermostat. Pairing ceiling fans with your HVAC system allows you to increase the thermostat a few degrees and still be comfortable, resulting in less energy consumption and less expensive bills. Modify fan speed according to room size and occupancy for your comfort. Turn ceiling fans off in unoccupied rooms to reduce excess energy consumption. Even opening windows during cooler parts of the day to provide natural ventilation can help, giving your HVAC a break and fresh air in your space.
Natural Circulation
Natural circulation in the home depends on temperature differentials–warm air rises, cool air sinks–inducing soft, natural and persistent airflow. It’s an unforced air exchange that’s most vigorous where a route exists for air to circulate from cooler to warmer areas. Even minor adjustments, such as opening a window or door, have an impact on the air flow in your home. It’s all about how a few easy steps and some consideration of natural circulation can have a significant impact on your comfort and effectiveness.
Window Use
Opening windows on opposite sides of your home creates cross-ventilation, particularly in the early morning or late evening when outdoor air temperatures dip. This natural breeze assists in flushing out stale air and inviting fresh oxygen, minimizing indoor pollutants and odors. For insect or debris-prone homes, window screens are a no-brainer. They let you benefit from the breeze without the hassle of bugs or leaves getting blown in.
Be sure to observe outdoor temperature and humidity. If it’s too hot or humid outside, it’s sensible to keep the windows closed to prevent your HVAC system from working overtime to compensate for lost cooling. Take a simple indoor thermometer tracking comfort and know that you’re staying healthy and comfortable. Window treatments such as blinds or curtains can assist by shading hard sunlight, making rooms cooler and less dependent on mechanical cooling.
Door Positioning
Keeping interior doors open is typically the easiest way to assist air circulating freely between rooms, so cold corners or hot spots don’t build up. Door undercuts or transfer grilles can be installed to allow air to flow even when doors are closed, if privacy or noise is an issue. For high traffic areas, a door stop lets you determine how far the door opens, helping you preserve privacy while keeping air flowing.
In certain homes, airflow is limited due to return air being ‘locked’ behind closed doors. Solving it can be as simple as closing doors or as complex as installing venting. The way you position doors can change with the seasons: for example, opening doors more during mild weather to encourage a gentle flow, or closing them in winter to retain warmth where needed. Each space is unique, which is why paying attention to how your home reacts to these minor adjustments is key.
Preventive Steps
Good airflow begins with preventative measures. Regular maintenance prevents costly breakdowns, lengthens system lifespan and encourages a cleaner indoor environment. These preventive steps are simple and enable homeowners to keep their HVAC systems up and running in between professional appointments.
Check and change air filters every one to three months, particularly in high-use or humid seasons. Clogged filters are a leading culprit in restricting airflow and boosting energy consumption.
Do spring and fall preventive maintenance – clean outdoor coils and check refrigerant levels before summer and winter. Dirt on coils or low refrigerant can make your system labor harder and consume more electricity.
Periodically check and tighten loose panels or fasteners on indoor and outdoor units. This not only prevents vibration damage, but helps keep your system efficient.
Confirm that circuit breakers haven’t tripped and verify thermostat settings or exposed wiring, before you jump to a fancy-schmancy problem. A lot of airflow problems are the result of stupid, correctable errors.
Maintain a maintenance record or list of preventive steps Track when filters change, cleaning dates, and even small repairs to ensure no detail slips through the cracks.
Have a professional inspection at least annually. DIY steps manage most regular requirements, but only a professional technician can test refrigerant, calibrate controls, and detect early wear indicators.
Routine Inspections
A once-a-month check-up is what makes all the difference. Check air filters, supply and return vents, and exposed ductwork for dust accumulation or leaks. If you notice dust or obstruction, swap out filters and unclog vents ASAP to get the airflow going again.
Verify your thermostat’s batteries and settings on a monthly basis. Bad thermostats can create uneven cooling or heating, and replacing batteries is a simple solution.
Take time to listen for any new or unusual noises emanating from the blower, outdoor unit or ducts. Rattling, buzzing or banging can indicate a loose part or blockage. Record your discoveries in a straightforward log, and tackle little problems immediately to prevent major migraines down the road.
Cleaning Schedules
Vacuum vent grilles and blower components accessible every month or two. Note reminders on your calendar or digital planner so assignments aren’t missed.
Vacuum around all registers and the main hvac unit. Pesky dust and debris accumulate fast – particularly in pet-friendly households or windy times of the year.
Clean off the thermostat, swap its batteries twice a year. Regular cleaning maintains sensor accuracy. Include these in your routine home cleaning checklist for maximum effectiveness.
DIY Tools
- Screwdrivers for opening grills and panels
- Flashlight for inspecting dark ductwork or units
- Vacuum with hose attachments for vents and blower wheels
- Thermometer and humidity monitor to track room conditions
- Duct tape for temporary sealing of minor leaks
- Notepad or digital checklist for logging maintenance
A vacuum with a hose attachment works best to suck dust out of the vents, ducts and fan blades. A thermometer and humidity monitor paint a crystal-clear portrait of your interior climate, allowing you to identify system inefficiencies. By using a checklist, your maintenance is methodical and thorough, helping homeowners catch issues early without missing important steps.
Conclusion
Taking on airflow at home with a few inexpensive, uncomplicated steps can generate big results. Replacing grimy filters, ensuring vents remain open and unobstructed, and inspecting ductwork for leaks or obstructions all contribute to maintaining optimal operation. Fans and thermostat tweaks can provide a fast hit of comfort. Trusting nature — like cracking open windows on nice days — adds an additional simple layer. Adhering to regular cleaning and maintenance really does a lot to help prevent future issues. If these don’t fix the problem, it’s time to call a trusted HVAC technician. Dependable assistance is just a call away. Numerous common issues can be taken care of prior to making that call.
Frequently Asked Questions
What are the most common causes of poor airflow at home?
Filters, vents and ducts done dirt cheap! Checking these spots is an easy do-it-yourself first step before you call a technician.
How often should I replace or clean air filters?
Change or clean air filters every 1–3 months. This helps your airflow and takes strain off your system.
Can I adjust vents to improve airflow in certain rooms?
Sure, opening or closing vents can balance airflow. Ensure all vents are open and unblocked for uniform air delivery.
What should I check in my ductwork for better airflow?
Check for dust, debris, or obvious leaks in ducts. Leaky seal and dirty ducts can kill airflow.
How does using a fan help with airflow?
Fans push air through your home assisting your primary system and offering you increased comfort.
Should I adjust my thermostat settings for better airflow?
Don’t adjust your thermostat frequently, stick to a consistent temperature. Don’t switch constantly, it helps your system flow and keeps good airflow.
Are there natural ways to improve airflow indoors?
Yes, crack open windows and doors when the weather is nice to really get fresh air blowing through.